3D Rendering Price

3D Rendering Price and Cost?

3d Rendering is the creation of images or animations that show an architectural proposal, presenting the features of the designed structure. It is a visualisation technique that has the potential to produce realistic, three-dimensional renders, including textures, furnishings, the effects of light, etc. 

3D renders are used by architects, designers, engineers, planners, etc. When working on an architectural project, renders help all of the different perspectives of these different people to come together, aiding communication and smoothing collaboration. 

There are many types of 3D rendering services, the choice of which is a major determinant of how much the service will cost. There is residential, interior, exterior, landscape, and even product rendering. There are 3D floorplans and architectural animation and virtual reality. 

3D Rendering View Price
Interior – Residential $300-$800
Interior – Commercial $450-$1500
Exterior – Residential $300-$850
Exterior – Commercial (small) $550-$1000
Exterior – Commercial (Large) $900-$3000

Price Ranges and What To Expect

3D rendering jobs vary immensely with respect to different factors, regardless of what the job is. In fact, architectural 3D rendering tends to be quite unpredictable in terms of final costs. 

$300 – $500 per image

This is generally the price range for basic 3D rendering of a good caliber. However, our work is extremely high and our smaller jobs for project home builders fall in this price range. You below what we produced for this price range with our 3d rendering Sydney client.
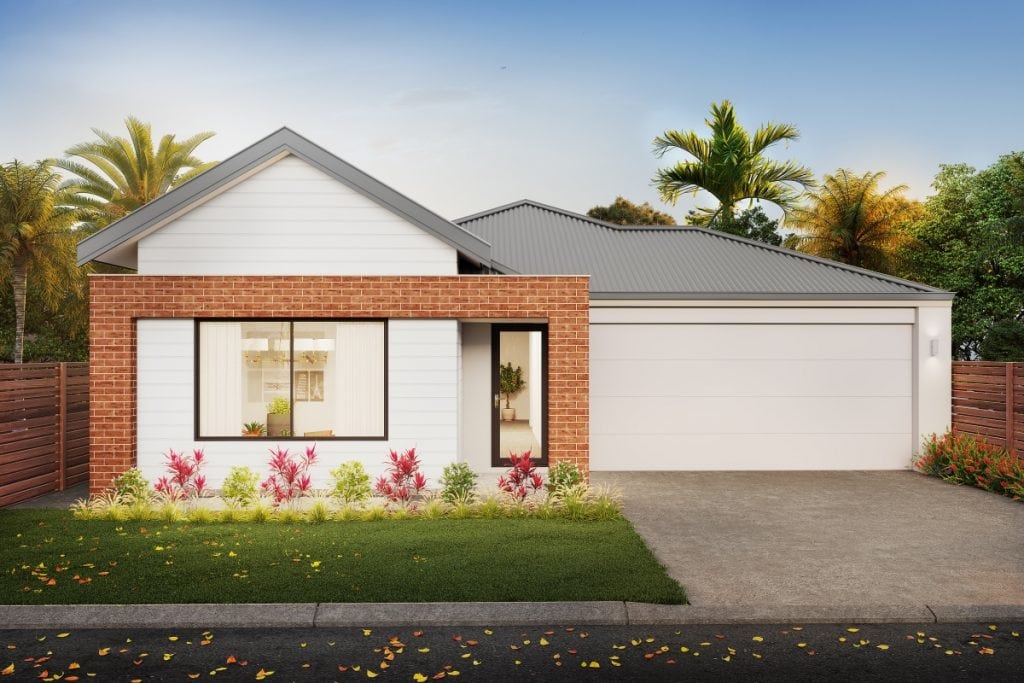
exterior 3d rendering price

With other companies It is advised to go for this type of work of course when finances are a concern, and but you want good work (though not of the highest caliber). This tier of work is often utilized to gain approval from councils, basic plans, and perhaps real estate work. It is acceptable for use when working with architects, designers, builders, developers or real estate agencies, especially when the project is a residence. Naturally, even for this price, you’ll have to look at portfolios, reputation, design, and overall quality. It is always better to be safe, and you don’t want to be overcharged for quality of work that does not really exceed that of the lower tier. 

$500 – $3000 per image

This price range is really the gold standard for 3D rendering work. It is the most used option for professionals, such as architects, designers, builders, developers, and even others such as those that work in real estate and marketing. For such a price, you can expect great work. 
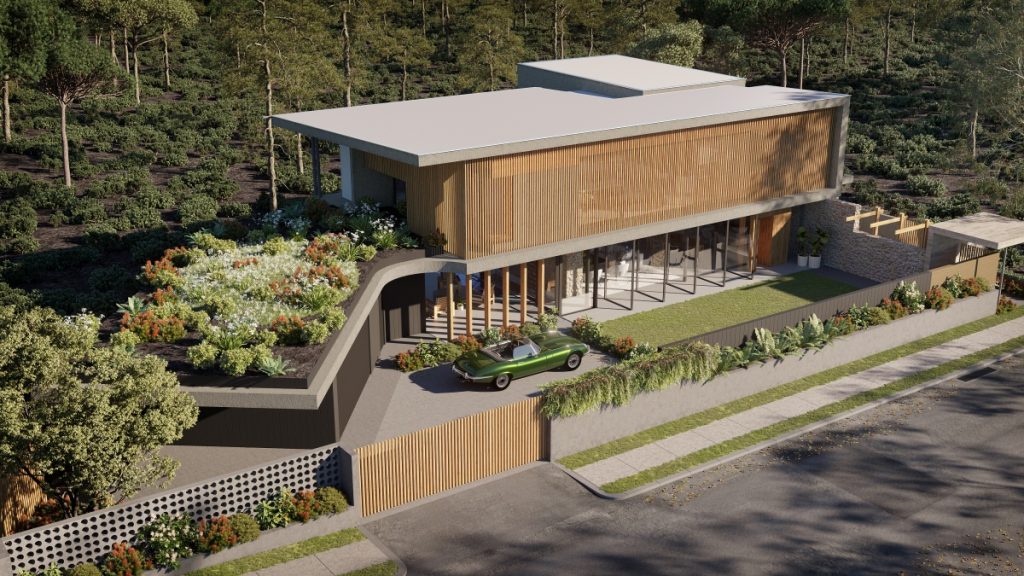
3d rendering cost

Most often, this tier of work is done for planning, concept design, getting approvals, and the like. It is actually employed more on homes that are higher end and larger scale projects. It is also utilised when the intention is to sell, for attractiveness and getting approval or budget. 

Of course paying larger sums for 3D rendering entails ascertaining whether or not the company really produces higher quality work, if they are experienced and professional, and if they have an extensive portfolio and reviews. 

$3000+ per image

This tier of 3D rendering is for companies and corporations with large-scale projects and looking for rendering packages with an abundance of revisions. Naturally, for those willing to invest millions on a business endeavor, the thousands for an amazing 3D render that could potentially bolster marketing on an exponential scale will be worth it. It is most certainly not the go to option for the average client, but some go for it. 
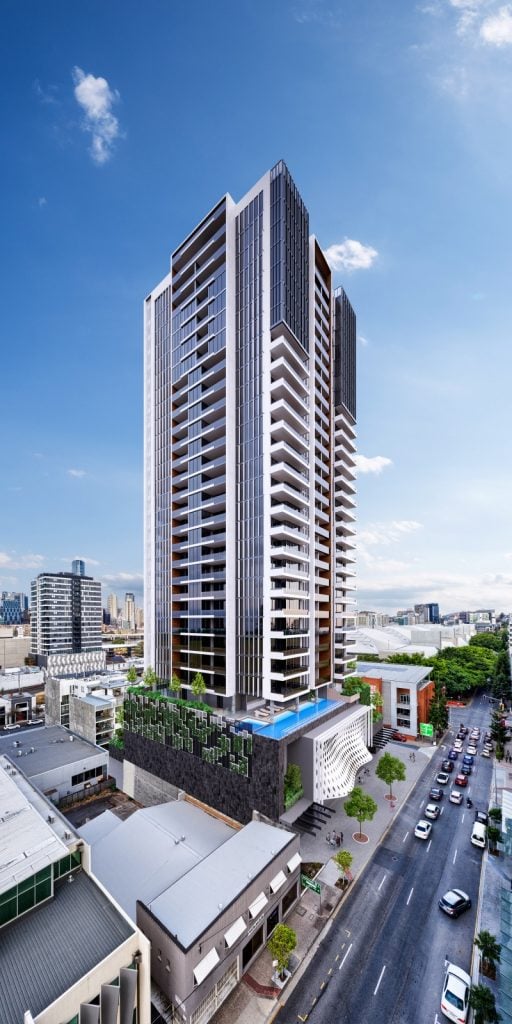
Skyscraper 3d architectural visualisation

Architectural visualisation jobs like this should be bought only from top architectural rendering practices. They must be experienced and reputable, especially in working with large-scale projects such as this. You may want to look into their client history as well as their portfolios to see their noteworthy work. 

$100 – $250 per image

This is the cheapest range for 3D rendering. Clients that purchase services for this price should be wary. In fact, this price range should only be considered for conceptualisations or brainstorming purposes on personal projects. Only in instances when price is the main concern and high quality isn’t needed is this range really acceptable. 

Most in house BIM/CAD software can produce the same quality 3d render as what you will be paying for in this range.

Naturally, there are companies that will try to mislead you into thinking that you could get amazing quality for very low prices. Clients have to be critical and look at their portfolios to check if they show real projects, consistent quality, and detailed images. They have to communicate extensively and check for possible costs that can be added to the initial quote.

 It helps to read reviews about a business, check its reputation, and get a feel of how genuine it is as a practice. A good rule of thumb is that “if something is too good to be true, it probably is”. 

How Am I Charged for 3D Rendering?

Per-Image: Some firms charge by the number of rendered images you ask for. Most smaller projects like residential renders fall under this category.

Per-Project: This happens most often when you provide details of a project that is larger in scale and requires multiple diverse rendered images.

Factors that Determine Price & Cost

There are three main components that determine the price of a 3D rendering. That is labour, time and quality.

Labour cost

This is a familiar concept — the more labour involved, the more expensive a job will be. Jobs involving numerous renders, or those of increasing detail or complexity will naturally involve more labour. 

An important part of labour includes how complicated it is for the 3D artist to comprehend a client’s plan and meet the expectations of their vision. Generally speaking, if a client communicates their plans well, submits more files with more details, provides a comprehensive brief, and supplies images with ideas and information about styles, the cost of the job has potential to be lower. Some clients even give models that can be followed.

Conversely however, if the client is unclear or provides less resources, the 3D artist has more to figure out, and may even need to make more revisions, which of course increase cost. 

It helps to understand that 3D rendering in Melbourne is not always straightforward. The work is an extensive process that involves modelling, texturing, lighting, cameras, and post-processing. In some cases, seemingly complex scenes are actually simple to render, while in other cases, things that look plain are actually difficult. It helps to do research and ask questions to understand the process in order to better comprehend pricing. 
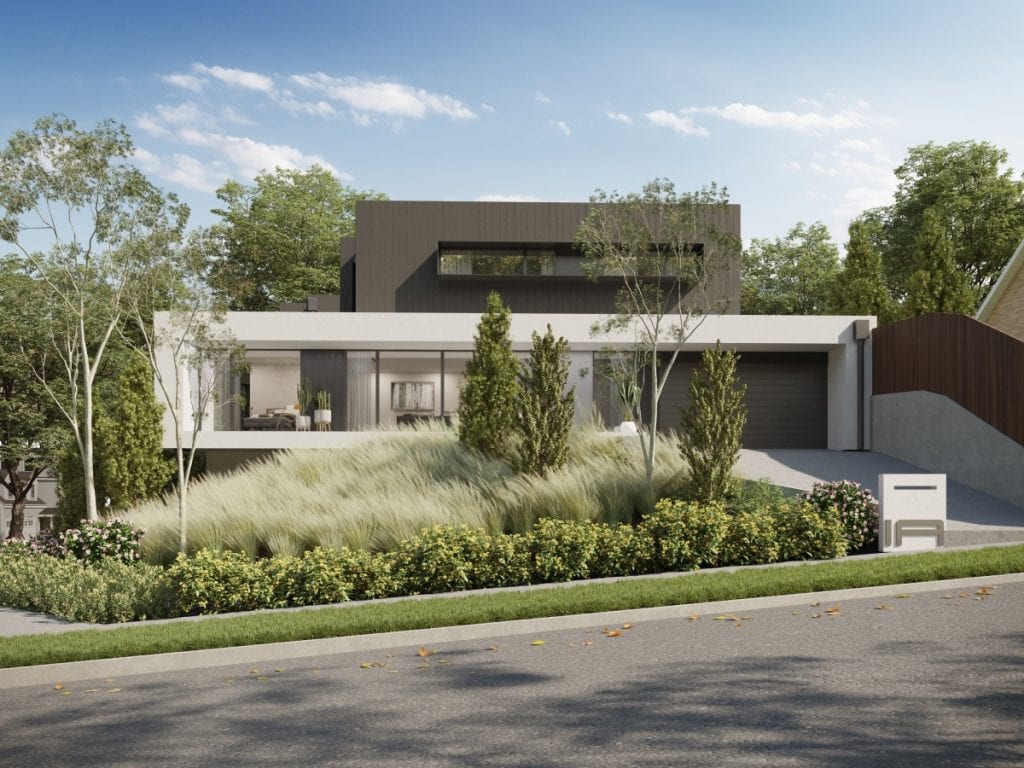
Time

In addition to labour, the time that a company uses their computers to render your job is also a concern, since it increases their operating costs. The amount of time that it takes to render images is directly proportional to their size and how realistic they are. Higher quality images naturally take longer and use more powerful computers, since there will inevitably be data and pixels to process. 

The resolution of your image, amount of detail, complexity of shapes, variability of lighting conditions, etc. all merit increases in rendering time. However, clients can reduce rendering time by limiting their revisions, which can be done again by communicating well, providing comprehensive plans, and respectfully giving detailed feedback. 

Stringent deadlines that may require teams to work longer hours also will increase the cost of your job. Quality may also suffer if deadlines are urgent, so providing ample time for artists to work may be the most prudent choice clients can make in this aspect.

Quality

This is quite self explanatory. Obviously the higher the quality of the 3D render and the greater the skill the artist has the more expensive a 3D render will be.

The post 3D Rendering Price appeared first on RenderVision.

this post first appeared on RenderVision via https://rendervision.com.au

3D Rendering Resolution

What Do We Mean When We Say “Image Resolution”?

When dealing with digital images, the term resolution refers directly to image quality or sharpness. Every digital image is made up of small, colored squares — these are called pixels, and they are the basic measurement unit of digital images. Often this is given in image size, which refers to the dimensions that an image has, given by the number of pixels in [width] x [height]. To give an example, a resolution of 1000p x 500p refers to a rectangular image shape, in which the width is double its height. 

Low image resolutions appear blurry or pixelated. Detail is lost, and you end up seeing more of general color areas. Higher resolutions on the other hand, have greater clarity. In rendering and animation, naturally one would prefer higher resolution images, in order to see details. 

When dealing with space, resolution is also measured in pixels per inch (PPI). On digital screens, this refers to the number of pixels in an inch or 2.54 cm. You may have also heard of dots per inch (DPI). Although these are used interchangeably in many situations, DPI actually talks about physical printing, particularly the number of color points in an inch of a printed photo.

Though this might be confusing, imagine that you can fill up a 1000p x 1000p space with an image of 20PPI or 100PPI, due to digital resizing. Though they occupy the same space, the 100PPI image would be much clearer. Though PPI can define image size, the opposite is possible as well. Generally speaking, the higher the PPI, the bigger an image’s size can be without compromising quality.

Web and Print

Nowadays, many images are viewed only online or on the screens of phones and computers. On websites, the best choice you can make is not overdoing quality, so as to minimise the time your site takes to load. This will optimise the experience people will have with your site. Compressing your images to make them the exact size you want them to be is worthwhile in terms of optimization. 

For printing on the other hand, a higher resolution is recommended, in order to produce images of good quality. The standard for printing is 300PPI, while 72PPI is good for web purposes. 

The need for extremely high resolutions on large-scale printing presents problems, as it is impractical to create absurdly large images. You will most definitely run into problems with rendering software, system memory, and file size. The best solution is to first work with high PPI, and then scale down after editing has been completed. It wouldn’t make sense to create a high resolution image whose digital size matches its physical size, since things like billboards aren’t viewed very closely anyways. High resolution is generally not as necessary when a printed image is intended to be seen from a distance.

In fact, the DPI that you can use actually varies based on how far the intended viewer should be. The further the viewer, the lower the minimum DPI.

Images that are held in the hand (brochures, fliers, etc.)

200+ DPI

Images that are viewed at a moderate distance of around 2m (posters, etc.)

Around 100 DPI

Images that are viewed from a relatively far distance of around 10m (billboards, etc.)

Around 20 DPI

Animations

The resolution that you would want your animation to have depends on its use and what kind of screen you will be presenting it on. Naturally, that will be presented on a projector or in a movie theatre will require a higher resolution than something that will be watched on a laptop. Watching videos, you may have heard of figures such as 1080p, 720p, or 480p. These numbers refer to the height of the video. To give some examples, 1080p, the standard for high definition, refers to a 1920p x 1080p video resolution. 720p refers to 1280p x 720p, and 480p refers to 640p x 480p. For architecture-purposed animation, 1080p is the general standard. Naturally, increases in animation resolution also increases the time it takes to render many times over. Expectations should be set in terms of resolution and working time with respect to these things.

Textured 3D Objects

Jobs that involve texturing 3D objects generally depend on the proportion of the final size of an image to the part of the image taken up by the textured surface. An 1000p x 1000p image, 50% of which is taken up by the textured object would require at least a 500 x 500 texture size. How near or far a textured 3D surface is from the camera also matters, and this should be taken into account to ensure its quality. Texturing often involves alterations in an object’s color, shine, roughness, etc., so in order to make sure that it looks realistic, it would be better to give an appropriate allowance for its resolution.

3D renders are used by architects, designers, engineers, planners, etc. When working on an architectural project, renders help all of the different perspectives of these different people to come together, aiding communication and smoothing collaboration. 


The post 3D Rendering Resolution appeared first on RenderVision.

this post first appeared on RenderVision via https://rendervision.com.au

3D Rendering Resolution

What Do We Mean When We Say “Image Resolution”?

When dealing with digital images, the term resolution refers directly to image quality or sharpness. Every digital image is made up of small, colored squares — these are called pixels, and they are the basic measurement unit of digital images. Often this is given in image size, which refers to the dimensions that an image has, given by the number of pixels in [width] x [height]. To give an example, a resolution of 1000p x 500p refers to a rectangular image shape, in which the width is double its height. 

Low image resolutions appear blurry or pixelated. Detail is lost, and you end up seeing more of general color areas. Higher resolutions on the other hand, have greater clarity. In rendering and animation, naturally one would prefer higher resolution images, in order to see details. 

When dealing with space, resolution is also measured in pixels per inch (PPI). On digital screens, this refers to the number of pixels in an inch or 2.54 cm. You may have also heard of dots per inch (DPI). Although these are used interchangeably in many situations, DPI actually talks about physical printing, particularly the number of color points in an inch of a printed photo.

Though this might be confusing, imagine that you can fill up a 1000p x 1000p space with an image of 20PPI or 100PPI, due to digital resizing. Though they occupy the same space, the 100PPI image would be much clearer. Though PPI can define image size, the opposite is possible as well. Generally speaking, the higher the PPI, the bigger an image’s size can be without compromising quality.

Web and Print

Nowadays, many images are viewed only online or on the screens of phones and computers. On websites, the best choice you can make is not overdoing quality, so as to minimise the time your site takes to load. This will optimise the experience people will have with your site. Compressing your images to make them the exact size you want them to be is worthwhile in terms of optimization. 

For printing on the other hand, a higher resolution is recommended, in order to produce images of good quality. The standard for printing is 300PPI, while 72PPI is good for web purposes. 

The need for extremely high resolutions on large-scale printing presents problems, as it is impractical to create absurdly large images. You will most definitely run into problems with rendering software, system memory, and file size. The best solution is to first work with high PPI, and then scale down after editing has been completed. It wouldn’t make sense to create a high resolution image whose digital size matches its physical size, since things like billboards aren’t viewed very closely anyways. High resolution is generally not as necessary when a printed image is intended to be seen from a distance.

In fact, the DPI that you can use actually varies based on how far the intended viewer should be. The further the viewer, the lower the minimum DPI.

Images that are held in the hand (brochures, fliers, etc.)

200+ DPI

Images that are viewed at a moderate distance of around 2m (posters, etc.)

Around 100 DPI

Images that are viewed from a relatively far distance of around 10m (billboards, etc.)

Around 20 DPI

Animations

The resolution that you would want your animation to have depends on its use and what kind of screen you will be presenting it on. Naturally, that will be presented on a projector or in a movie theatre will require a higher resolution than something that will be watched on a laptop. Watching videos, you may have heard of figures such as 1080p, 720p, or 480p. These numbers refer to the height of the video. To give some examples, 1080p, the standard for high definition, refers to a 1920p x 1080p video resolution. 720p refers to 1280p x 720p, and 480p refers to 640p x 480p. For architecture-purposed animation, 1080p is the general standard. Naturally, increases in animation resolution also increases the time it takes to render many times over. Expectations should be set in terms of resolution and working time with respect to these things.

Textured 3D Objects

Jobs that involve texturing 3D objects generally depend on the proportion of the final size of an image to the part of the image taken up by the textured surface. An 1000p x 1000p image, 50% of which is taken up by the textured object would require at least a 500 x 500 texture size. How near or far a textured 3D surface is from the camera also matters, and this should be taken into account to ensure its quality. Texturing often involves alterations in an object’s color, shine, roughness, etc., so in order to make sure that it looks realistic, it would be better to give an appropriate allowance for its resolution.

3D renders are used by architects, designers, engineers, planners, etc. When working on an architectural project, renders help all of the different perspectives of these different people to come together, aiding communication and smoothing collaboration. 


The post 3D Rendering Resolution appeared first on RenderVision.

this post first appeared on RenderVision via https://rendervision.com.au

Making Use Of 3D Rendering In Design And Also Style

What is 3D rendering?

3D rending is a computer graphics procedure whereby visualisers create a usable 3D photo by including textures to a wireframe version. It has actually begun jumps and also bounds within the last ten years and also has several planned from video gaming & animations to building visualisation.

What is the standard procedure?

To start with, the artist will certainly develop a wireframe design, a kind of skeletal system constructed from factors and lines, of the product or design in his 3D graphics engine.

When the wireframe is complete, the renderer will utilize the software application to use appearances to the design in order to replicate surfaces with colours, structures, shadows and representations. This can be as practical or as superb as the quick needs, yet for the most part, the musician will certainly be wanting to duplicate real-life surface areas to a high level of precision.

When the design is fully-rendered, the musician will typically insert it right into a digital context to show how the product will look in the real world. This could be for technological functions, for example, revealing devices on a factory production line, or for marketing or advertising and marketing material, such as showing a brand-new product in a store front.

Different Sort Of 3D Rendering

When it pertains to 3D rendering there are two main standard approaches. Depending upon the processing speed and the capability of your 3D software, you can take advantage of either approach. The very first approach that you need to learn about is referred to as real-time rendering. This method is most utilized in video games, as the photos are loaded so fast that it in fact makes them appear like they are relocating. Certainly, performance such as this requires a great deal of refining speed.

The 2nd technique of 3D rendering that you require to know about is referred to as offline pre-rendering. The major function of this technique is to produce high quality as well as this is the main emphasis for 3d rendering in Sydney when associating with design. This approach is made use of when speed and also movement are not the main concern, simply high quality. Along with this, it provides the user the special ability to shade as well as generate input other imaginative techniques.


Making Use Of 3D Rendering In Design And Also Style

Designing and modelling buildings can be truly gratifying. Keeping that being stated, there is no customer available that intends to pay countless bucks to have a structure erected without seeing the overall item and that is where 3D rendering can be found in convenient. Artists, designers, and also designers can utilize 3D rendering software program to reveal the consumer specifically what their structure is mosting likely to look like when it is finished.

Not only will does this provide you the capability to review your own job, yet it can likewise give you the capability to identify potential problems. Council and government authorization agencies typically request these pictures to see what future growths will certainly resemble and also exactly how they will certainly influence the streetscape of existing locations.

One more crucial factor is to sell structures as well as make use of as a marketing device prior to building and construction of a complicated is build. This allows financiers to restore some funding early on in their jobs.

3D Rendering In Movie

If you have been enjoying TELEVISION recently and keeping up with the most up to date flicks, you have without a doubt seen what an influence 3D rendering has carried this industry. Tons of computer animations as well as CGI kind graphics are being made use of in contemporary film and also motion pictures. Actually, a great deal of older films like Star Wars as well as Star Expedition are being remade with the help of 3D rendering to carrier long-time fans with brand-new and also amazing experiences

Just how to find out 3D Rendering

If you do not want to participate in college, however still want to pick up from a specialist, you ought to take into consideration locating a mentor. Locate someone who agrees to show you the ropes. Use their experience as well as expertise to assist you in the best direction!

Relying on the individual concerned, there is an opportunity that they’ll be willing to become your mentor free of charge. Even if you require to pay a per hour fee, having an advisor by your side will show to be well worth the expense!

Whether you’re desiring be the lead renderer at a renowned firm, get rendering for that indie video game you have actually constantly imagined developing, want to begin a building 3d rendering solution or even just discover a brand-new ability as a hobby, there are a number of various courses aid you enter into this interesting location as well as develop the skills you need to prosper.

Design a site like this with WordPress.com
Get started